


Article content
If you are here it is because you went through the first day. Congratulations, and today we have to see how to master the Lightroom import system.
Importing photos into Lightroom means that you will add them to the catalog, the same catalog that we talked about in the last post. This way you can start your edits, use presets or even export them to share on your social networks.
The entire import process in Adobe Lightroom is very simple, and this post will give you valuable tips for you to get the most out of this step.
The best way to enjoy this post is to go along on your own photo import process with what you read here.
Importing photos into Lightroom
Regardless of the origin of your photos, folders, memory card or direct from your cameras, the process is the same.
A nice thing to always leave activated is the option to discover new photos, or SD cards, which will be very useful when you are importing new photos. And this option can be found on the menu Preferences (MACos = File > Preferences / Windows = Edit > Preferences)

So Lightroom will open automatically when you insert a memory card or your camera, and will be almost ready for the import process to begin.
Importing your photos and videos into Lightroom
Location, keywords and metadata
Importing photos as I said is quite easy and we have more than one way to do this. The process of importing photos into Lightroom can be time consuming, everything will depend on the number of photos and the type of thumbnails you use. I’ll talk about the thumbnails later, but in the in the end it is a very important process to have a healthy catalog of images.
If the dialog box does not open automatically when you connect the card itself or the camera , yes it does, don’t worry. You can import your photos and videos smoothly by following these steps:
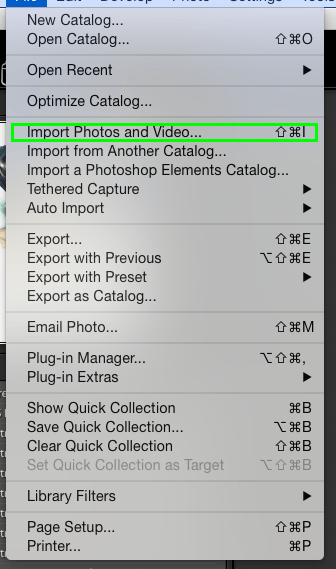
Following on File> Import photos and videos you will have access to the import screen. You can also use the shortcuts (MACos = Command + Shift + I / Windows = CTRL + Shift + I), but at least for me it is easier just to go to File> Import.
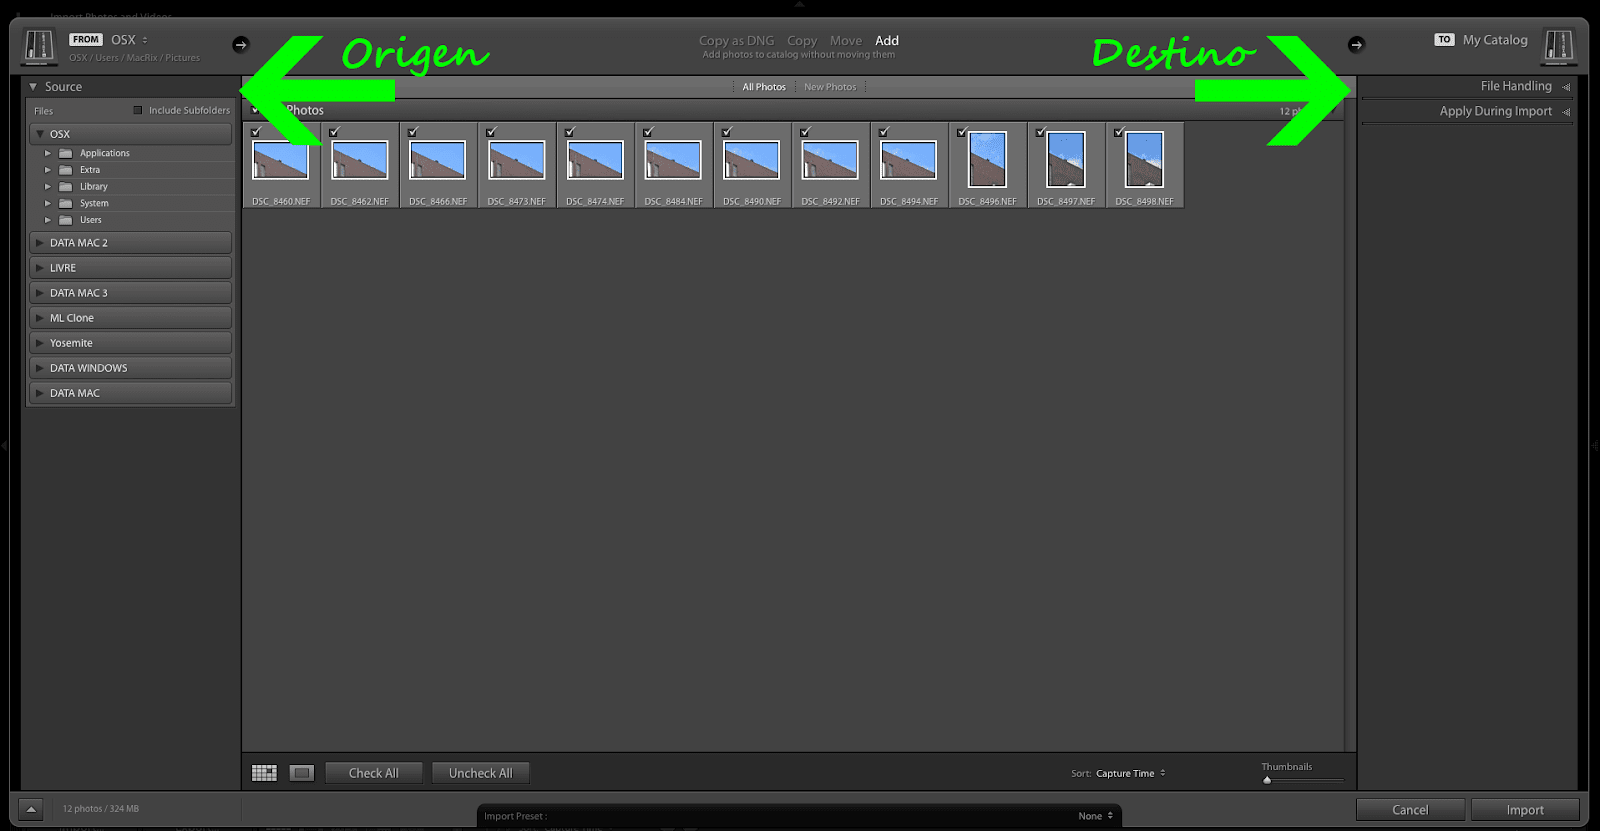
There you can choose the source disk, the location where your photos are on the left column, and you can also choose the destination folder, where your photos will live, on the right column.
Some important things during the process of importing your photos can be done now.
For example, choose whether to apply a preset during import, applying keywords, choose or create a collection, and showing the correct metadata copyrights, if it’s not configured on your camera.
So it is time to think on how you will organize your files right now, it will make your life much easier on future imports.
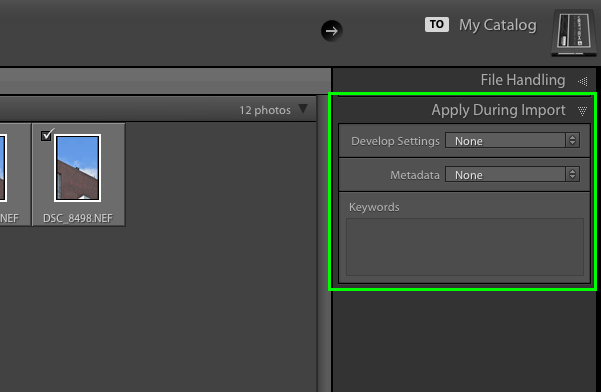
During import you can choose a preset to be applied, as well as a specific metadata preset. Depending on the camera / lenses I am photographing with, I have presets prepared for this time, so I can adjust things beforehand while importing my photos just by choosing a develop preset on this screen.
One of the most important things for this screen is the kewording process. You can use this section to describe the images being imported, so when you need to perform a search on the Lightroom catalog it will use this information to bring back your photos. I normally use a clear 1 word description, and I put a lot of them.
On the middle top bar you can also choose whether to import your photos using your camera’s native file format, or whether to convert it to DNG. DNG files are digital negative files, and are compatible with a wider range of editing programs.

Here you also have options to move your files from the card or camera directly to the chosen folder, don’t forget that moving means that they will no longer exist on the card or camera. And if you happen to have already copied the files manually to your HDD, you can just add them to the Lightroom catalog with the ADD option.
You can make a normal copy (which preserves the camera’s file format), make a copy as DNG, or just ADD these files to the catalog. Remember the first article, you don’t need to create a new catalog for every import, just import new photos to an existing catalog and you are good to go.
Choosing which photos will be imported into LIghtroom
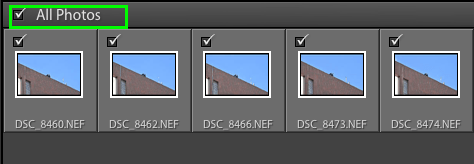
During the import process you can select the photos that will be imported into your catalog, leaving out those you don’t like! I always import absolutely everything, and during my culling process I’ll choose my keepers and my rejects, this way I avoid leaving outside of my catalog any possible keeper that I forgot to choose. But if you are certain of the images that you want to import you can use the checkbox to check just the photos that you intend to add to the catalog.
With everything set just click on the Import button and go grab a coffee. This is all for the Lightroom import system, but I want to give some extra tips that will help your Lightroom import workflow, and make this process almost bullet proof.
Advanced Lightroom Import System
One thing you always need to keep in mind during this process is what your import structure will be like, and how it will be maintained over the next few years. Believe me when I say, you can lose important files if you don’t pay attention to where you keep them!
Manipulating files in Lightroom
In the import destination tab, we have many cool options. And some are very useful. The first one is what kind of thumbnail you will want your photos to have. When Lightroom is displaying our photos we are not seeing the original file, but just a preview thumbnail. There are 4 types of thumbnails, two of which are very useful even for computers with performance issues.
In the menu menu Build Previews we can choose the size of our images previews.
- Minimal (Low quality previews, not used for editing but useful for performance)
- Embedded & Sidecar (uses the preview built into the Raw file if there is one)
- Standard (Builds a preview for viewing images in Loupe View, but without zooming in)
- 1:1 (Best quality previews, but the slowest to build and takes more space on your disk)
We can also create Smart Preview. A Smart Preview is a high-quality and compressed preview with 2540 pixels along the longest edge.
Thumbnails / Previews also influence how Development mode works, especially when zooming in on the photo. I always recommend choosing 1: 1 thumbnails as they work very well for zooming, as it has the full size of the photo.
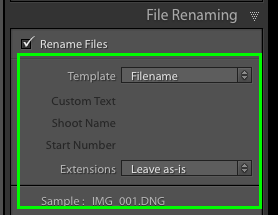
You can also choose whether to rename the files, whatever the name you choose. I don’t particularly use this option, you can use it to your advantage for organization criteria.

By choosing the destination folder of the photos you can create sub-folders during the process of importing your photos.
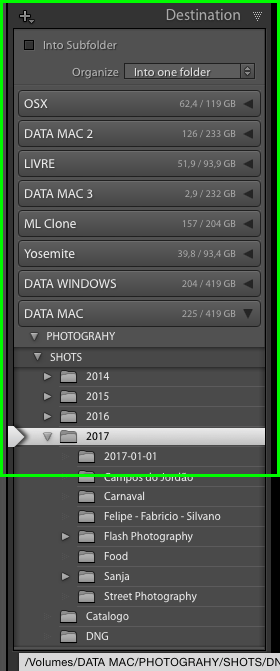
I always try to create a logical folder organization structure, and it starts on the Lightroom import system. Building this file structure is good for future projects and for finding your original on your HDD without using Lightroom.
I always create the following structure:
YEAR > NAME OF THE *EVENT* OR WHAT WAS PHOTOGRAPHED
This can be done directly during the import process, and after if need one or more subfolder inside the *EVENT* folder I also can do it inside Lightroom, not during the Import process. These additional folders will be used to store my FInals (TIFF files), my Exports (Jpegs High Res for the internet). So My final folder structure look like this
2019/Halifax (all RAW files gos here)
Exports (Inside Halifax folder. Just COntains edited jpegs for internet)
Finals (Inside Halifax. Containing all edited images for printing in TIFF or PSD Format )
You can choose any folder structure that you like, but I would advise to use something simple. If you have the habit of putting a folder inside another folder inside another one or more folders with large descriptive names, be advised that some operacional systems do not like it and it can corrupt your files just by having a huge file name or address.
Ending
Once you have determined all the variables for your Lightroom import system, just click on the import button and wait for the process to complete.
One last tip, if you already have a folder with many photos and want to import them into the Lightroom catalog, you can drag this folder straight into the Library Module and the import screen will open and you can perform all the metadata adjustments that you wish.
If you got here don’t be discouraged because you are just 5 steps away from mastering Adobe Lightroom.
Share this post and help more people!
There’s more tomorrow!
And if you started with this post be sure to see the others:
Mastering Lightroom in 7 days
Mastering Lightroom in 7 days – Day 01 – Catalog
Mastering Lightroom in 7 days – Day 02 – Import
Mastering Lightroom in 7 days – Day 03 – Library module
Mastering Lightroom in 7 days – Day 04 – Development module
Mastering Lightroom in 7 days – Day 05 – Editing your photos
Mastering Lightroom in 7 days – Day 06 – Presets and Colors
Mastering Lightroom in 7 days – Day 07 Export or Print

