


How to export photos from Lightroom to Instagram in high quality is undoubtedly a subject that everyone has already caught thinking about at some point. Today Instagram is the platform for disseminating your photos, and nothing better than knowing how to export high resolution photos from Lightroom.
In today’s post you will see how:
● Treat your photos on Lightroom
● Use the clipping tool in a custom way
● Which image format looks best on Instagram
● Export settings from Lightroom to Instagram
● How to export quality Lightroom photos
● How to transfer your photos from your computer to your phone without cables.
Exporting photos from Lightroom
Exporting a photo can be a super easy or super complicated task , it all depends on what you do with this photo afterwards. A photo to use on the internet is totally different from exporting the same photo to reveal.
Making an 8×10 frame is totally different from exporting a photo to make a 60×40 frame. I believe you understood that exporting a photo depends a lot on the end use you give it
And since nowadays 90% or more of the photographs produced are used only on social platforms like Instagram and Facebook, you need to know how to export photos from Lightroom that work well on these platforms.
Today we’re going to talk about how to export photos from Lightroom to Instagram, but you can use the same idea from this article to export photos from Lightroom to Facebook for example.
Of course, you will need to know what are the photo sizes required by each social network, and to make your life easier there is an infographic at the end of the article with the dimensions of photos for Facebook, Instagram, Pinterest and others.
Editing photos in Lightroom for Instagram
First of all you need to edit your photos in Lightroom, and here it doesn’t matter whether you use LIghtroom 5, Lightroom CC or Lightroom Classic CC. Edit your photos normally the way you always do. And of course, if you want to speed up the process, you can use editing presets in Lightroom.
As I always do my editing work in general, not just thinking about what will be on Instagram, after all the photo was not necessarily taken just to be used on Instagram.
So treat your photos in the normal way. Taking care not to forget any details. Work the exposure of the photos, colors and also adjust located to taste.
One of the things I like to do is use the sharpness control when I am going to post photos on some social platform, and especially in the case of Instagram.
Since your photos will be viewed normally on a small screen and compressed by social media to create a smaller file, raising the level of sharpness in the photos a little will help the photos stand out more.
Speaking of standing out more on Instagram, the biggest secret to posting good photos on Instagram is in the photo format, and of course in the composition . Although we don’t always take pictures just thinking about posting them on Instagram, as I said above, the pictures that are taken thinking about the Instagram format end up doing better.
Very wide or very tall photos do not usually work well on this platform due to the limitation of the cell phone screen and also how the photos are shown in the application.
Then the Lightroom Classic CC clipping tool comes in your favor, which you can access using the shortcut R.
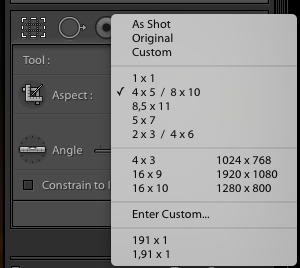
In the Lightroom clipping screen, choose the Custom option.
The cropping tool will help you better define the proportion of your photo as well as the composition. Although Instagram now accepts photos outside the 1: 1 ratio, it is evident that this size has been successful for many years.
The reason for this is clear, in this proportion you have to highlight the main subject of the photo, and thinking about more centralized compositions will help when choosing the 1: 1 ratio.
Today the trend is changing a little, mainly because we can send photos in other proportions, and of course with the change in the format of the screens of smartphones .
I see today that photos in a higher than wide proportion tend to have more views, likes and comments. This makes it very clear that the format of the screens of the newer smartphones makes a difference.
Now that you know where to crop your photo in Lightroom, you’ll choose the custom dimensions option. Then, in the dialog box, use a 5: 4 aspect ratio, which is nothing more than a slightly taller than wide photo.
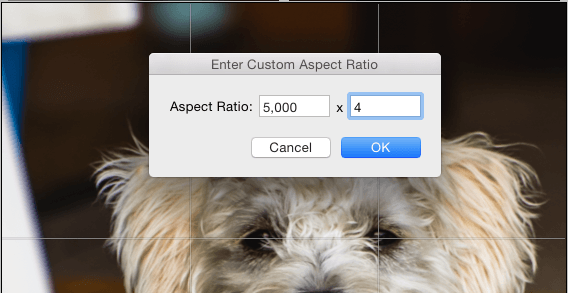
This way you will have to recompose your image, but with a good job here it will draw much more attention.
If you need to change the orientation of the Lightroom clipping tool between landscape or portrait, just use the shortcut on the X key on the keyboard.
How to export quality lightroom photos to instagram
After finishing all the editing of your photos it is time to export them in JPEG format, accepted format accepted by Instagram. Do not forget that the procedure that you will see here also applies to Facebook and other social networks, you just need to know the size of the image that each of them has as a standard.
And the first step is to select the photo you want to export and click on File and export (File> Export).
Of course, there is more than one way to access this menu, but to make things simpler I will mention just the most common way, so as not to confuse anyone.
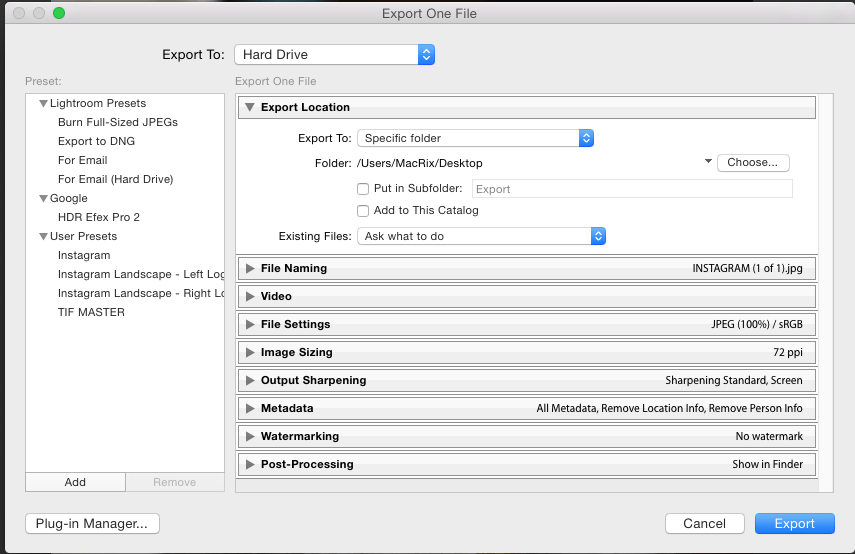
The export screen is full of options, and we don’t need them all right now. There’s a lot here that most people will never use, but it’s really good to know what each Lightroom export box option does.
Exporting is very simple, you just need to choose the location where you will save your photo, it can be on the desktop or in a specific folder on your computer.
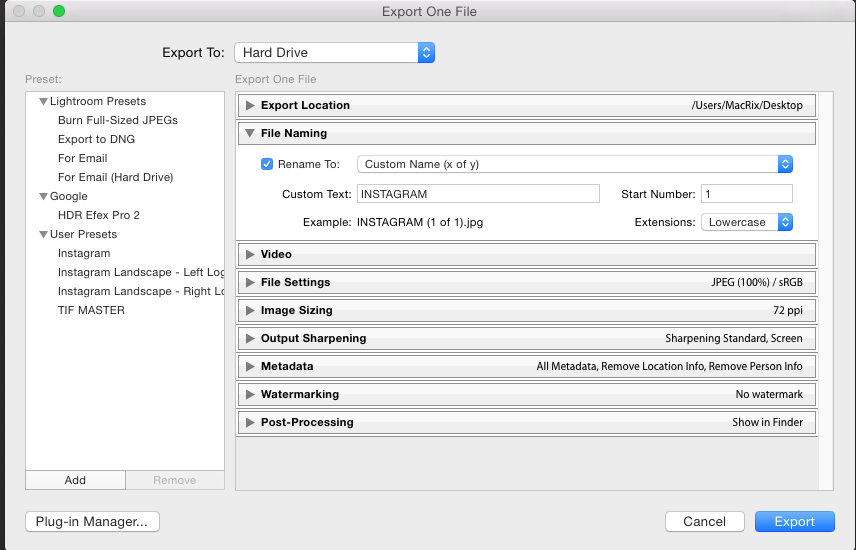
Then, in the next tab, you can choose the name of your photo, which is also very simple to do. And if you are exporting multiple files at once you can also choose how the file suffixes and / or prefixes will be named.
The next tab, image size, takes care of the scaling of the images, as we crop the photo before, you don’t need to change anything in this tab if you want to export the photo with the best possible quality.
The only option I advise you to make any changes is in the resolution part of the image. In the image resolution menu you can choose the amount of DPI, pixel density per inch, the image will have, 72 DPI works very well for photos that will be used on the internet. And normally you don’t have to choose anything higher than that.
Of course, in case you would like to have more resolution available in your photos you can use up to 150 Dpi for images that will be transferred over the internet. Keep in mind that the more Dpis the larger the file size in bytes.
In the file settings tab you will have important options to do, such as choosing the compression of your photo, the file format and also of course the color space.
The color space is simple, sRGB will be used only for photos that will only be seen on screens, computer monitors, smartphones and more. This is the internet’s color space. Compared to other color spaces such as Adobe RGB the sRGB has fewer colors.
Of course, you wonder if Adobe RGB is not worth using, and the answer is simple. If your monitor is unable to reproduce such colors it is not worth it. But this is a subject for an article, after all the chat here today is to export photos to Instagram.
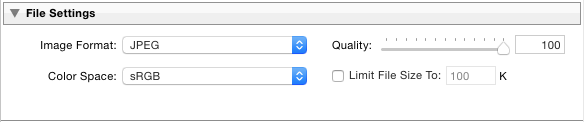
In the image format tab it is, just choose Jpeg and as for the quality, here it is not worth changing. Because this is where we will compress our photos more and how Instagram already compresses the photos by default.
The best thing we have to do is leave the quality of our photos at 100.
In the sharpness tab you can choose between 3 options, Low / Normal / High , for photos that will be used on small screens I advise you to use normal or high settings. Again thinking that Instagram will compress the image when you post.

In the metadata tab there is no need to make any changes.
If you want to add a watermark, the next tab will be the place to do so. Click export and you’re all set.
Extra tip. How to transfer photos from Lightroom to your phone
To post photos on Instagram we usually use the app on the phone, and transferring your images from the computer to the phone can be annoying, when we have to use cables.
To solve this you can use a very cool app called SendAnywhere , which is a great option for transferring photos over the WIFI network.
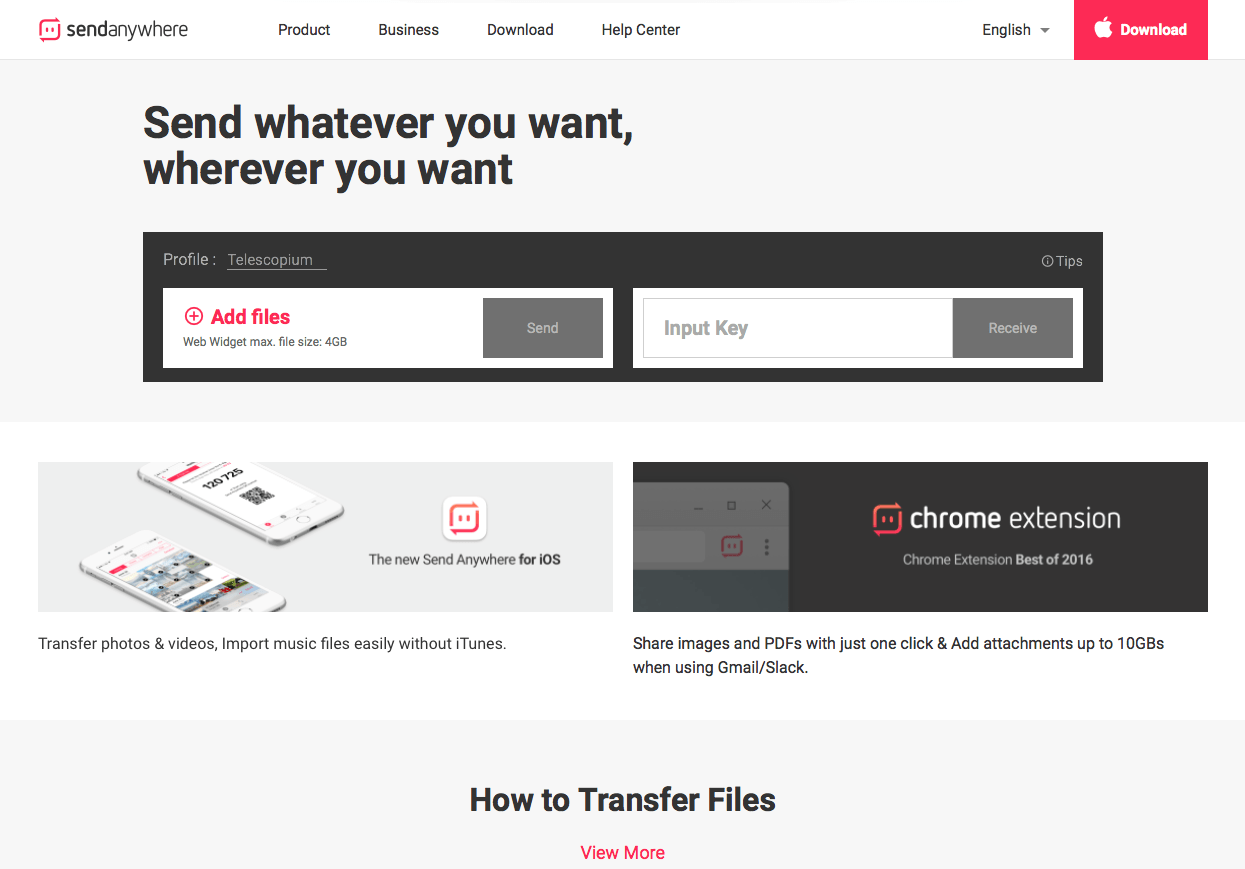
With options for macOS, Windows, Android and IOS, you can transfer files between these platforms in a very simple way.
Exporting photos from Lightroom to Instagram can be simple if you are already used to the whole process.
And as promised here is the link to the formats and size of images used on social networks. And what process do you use to make this work? Leave your tip there in the comments.

