


Article content
Today I’m going to talk a little more about how to edit your photos in Lightroom. In the end, I’ll include a simple workflow to help you work on editing your photos.
Developing Photos in the Basic Panel and Editing your photos
The Basic Panel is where I usually start when editing my photos, and you already had a preview of it in the past post. The adjustments you make to the Basic Panel (and all other panels below) are global adjustments.
This means that they apply adjustments to the entire photo. I usually work the basic panel one step at a time. And this helps me to define the photo as a whole and have a beautiful idea of what my final product will look like
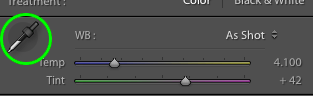
White balance
Before doing any editing I always like to have a good white balance. The dropper tool is my best friend when it comes to white balance.
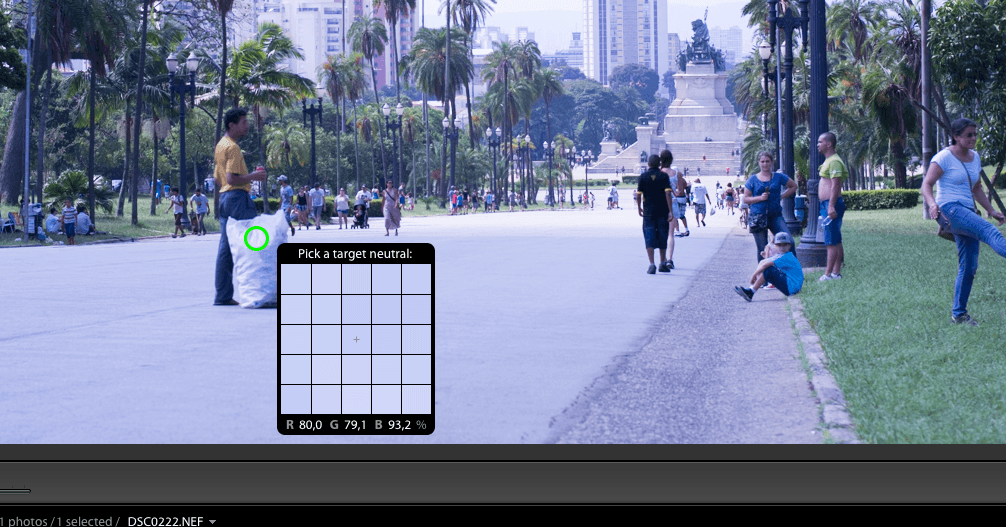
To start it up, select the tool and look in the photo for a neutral area, white or at least 50% gray, which are usually the areas that have the best color representation due to the lighting you are using.
If I am having trouble finding a neutral area in your portraits, I use the whites of the eyes. In the case of landscape photographs we usually use some stone or rock that was well lit at the time of the photograph.
Sometimes I change my white balance after using the eyedropper tool using the Temperature and Dye sliders (Temp / Tint). In order to get a better representation of what I saw when taking this photograph.
The option to adjust the white balance using the different white balance settings that come with the camera is also available. And you can also use them as a starting point when adjusting the white balance of your photos.
Exposure and contrast
This is where you adjust the exposure of your photo. To increase the exposure of your photo, click and drag the slider to the right. To decrease the exposure of your photo, click and drag the slider to the left.
To increase or decrease the contrast, the process is the same. It is possible to make large adjustments in exposure and also in contrast, but very wide adjustments are not very recommended, the best is to achieve good exposure and contrast when shooting, so we don’t introduce many strange artifacts resulting from heavy processing in our photos .

The exposure control will help to darken very light photos or lighten very dark photos, whereas the contrast control works in two different areas. Increasing the contrast makes the darker areas even darker and at the same time the light areas lighter.
You also have the AUTO button at your disposal, which will automatically adjust things other than exposure and contrast taking into account what Lightroom thinks is a balanced exposure for your photo. This can be a good starting point for adjusting your catches, and of course we can refine this settings manually.
Highlights and Shadows and White and Black
Highlights work only in the light areas of the photo, as well as shadow control only in dark areas.
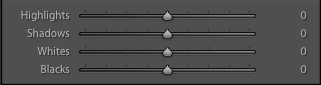
Here you can work artistically, and the amount of adjustments made will depend on your sense. You will often want to recover certain details in the darker regions of the photo, so you will use the shadow control to the right. The same goes for very light areas of the photo, but they are not yet completely white. They are great tools for adjusting certain details that both the contrast tool and the exposure tool were unable to adjust.
Blacks and whites work differently than contrast control, but it has almost the same effect. The difference here is that they work only in the colors mentioned. As they are more extreme adjustments, working only in defined colors, black and white, we can use these controls to improve the contrast of our photos.
Vibration and saturation clarity
Clarity is a bit like a smart contrast tool. It works by finding edges in the photo and making them sharper or softening them. I set this tool as contrast for medium tones in the photos. Super useful when used well.
I do not recommend using this control in excess, especially in images with little texture. And I also don’t recommend using this tool to “fake” a sharpness that the photo doesn’t have, so always use this tool with great care.
Vibration control is very similar to saturation control, but smarter. It works well in almost all colors, but it is much more controlled when it comes to beige tones, or skin tones, great for adjusting warmer colors. Very useful when you want to work all colors at once but in a measured way.
The saturation control, on the other hand, works in all colors, leaving them more or less alive, like all saturation control, here the premise is to be restrained, after all too much saturation can ruin a good photograph.
Tint curve, Split toning, HSL, Lens profile correction, transformation, effects and camera profile were all explained in detail in the last post. Things like Lens profile correction I usually do as a first or second process during my edits, just with the white balance, as this adjustment can slightly change the exposure and contrast of the photos. Tint curves used together with the adjustments I make on the basic settings tab, along with contrast, details and shadows. The process on the HSL tab, along with the vibration and saturation adjustments during my workflow.
Thinking this way I reduce all the work to just a few steps and not to 9 different tabs. Working at the same time on tabs that have related adjustments makes life a lot easier when it comes to seeing the work as a whole. It is useless to work only on general saturation without thinking about how the saturation of specific colors will look in your photo.
Developing photos and local adjustments
As soon as I finish all the global adjustments of my photos, I start the process of thinking about local details, which are super important to get the best possible photo. These details range from adjusting things like dirt on the camera’s sensor using the Clone tool to adjusting the lighting / exposure of certain areas of the photo with the help of the brush or filters available in Lightroom. All these details with certainly change how good your are in editing your photos.
As I already talked about local adjustments in a separate article here on the blog, I will ask you to go to this link here and have a nice read because in the article I explain everything about Local adjustments in Lightroom.
Simple workflow for image editing
The more you use Lightroom the easier it becomes, but nothing like having a coherent workflow to help. My workflow starts by analyzing the photo and wondering where I want to go with the edit.
The two initial steps I always take are lens correction adjustment and white balance. From then on everything will depend on where I want to go with the photo.
I work the exposure and the contrast together, if any adjustment is necessary, regardless of whether I have to use only the basic tab or also the tone curve tab. And then I go to the highlight and shadows section. Adjust this section until you have a good balance between colors and tones in the photo. Here the same goes, no matter what tab I use, but the result I want to achieve.
One thing I learned over time is that there are no rules when it comes to editing, the only rule you need to follow is the final concept of your project.
To help I will leave here a RAW file for you to train, download it here , and I will also leave a reference image.
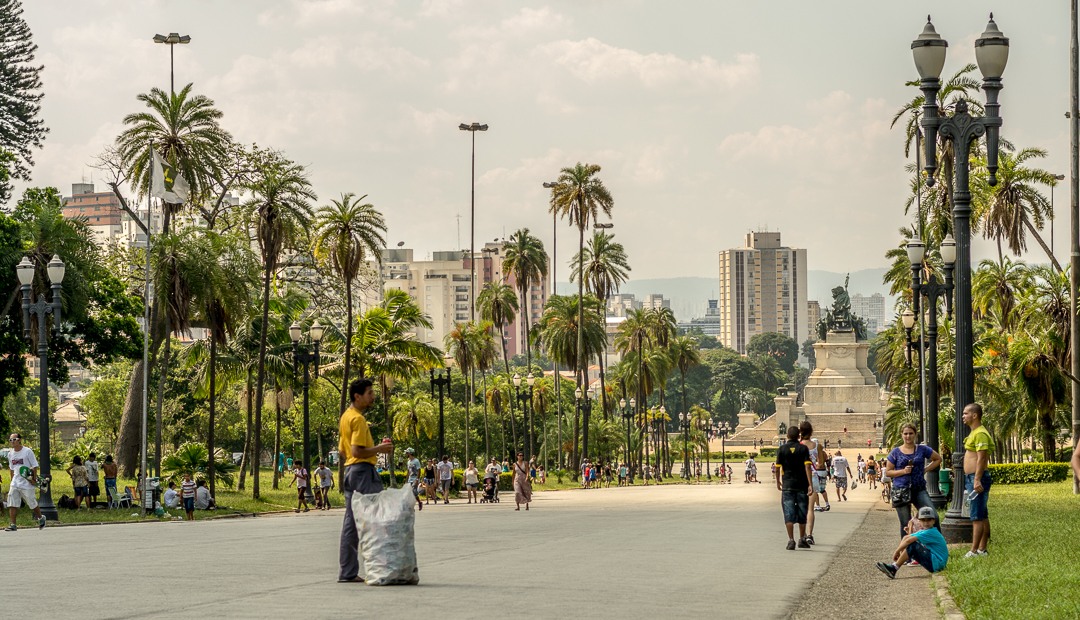
For now, I’ll use only the basic module controls, so you can get an idea of where you can get! And as for editing your photos most of the job will be done here if we are talking about basic edits and simple corrections.
As soon as we finish the 7 days you can export this or other photos with your edits, and post them on Instagram. If you do, use the hashtag #fotographiko so we can see the results! Take the opportunity to follow @rixmascarenhas
And be sure to share this post!
And if you started with this post be sure to see the others:
Mastering Lightroom in 7 days
Mastering Lightroom in 7 days – Day 01 – Catalog
Mastering Lightroom in 7 days – Day 02 – Import
Mastering Lightroom in 7 days – Day 03 – Library module
Mastering Lightroom in 7 days – Day 04 – Development module
Mastering Lightroom in 7 days – Day 05 – Editing your photos
Mastering Lightroom in 7 days – Day 06 – Presets and Colors
Mastering Lightroom in 7 days – Day 07 Export or Print

