


Article content
Are you still mostly using Auto mode on your camera, and forgetting to improve your photos?
Yes, it is a good way to start if this is your first DSLR, but sooner or later you will notice that your images look average and you are not making any progress.
So it’s time to sit back and learn a little more about the photography modes that your camera has always had and that will help you take better pictures.
Take control of your camera and improve your photos.
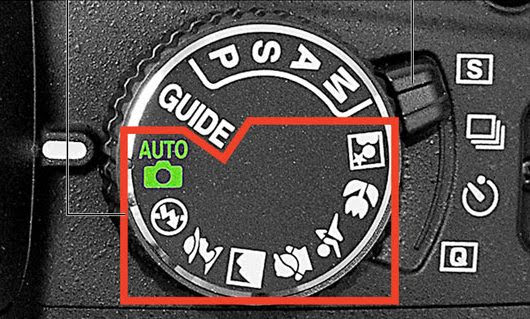
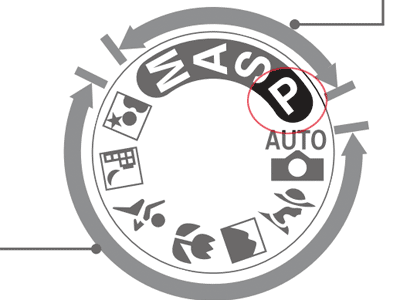
Program Automatic Mode (Auto)
Perhaps the best place to start getting familiar with your camera and what it can do is automatic mode.
And many cameras in addition to having the fully automatic mode, the little green camera, still have programmed modes, within the automatic mode.
These pre-programmed modes allow you to choose the type of scene you are shooting, allowing you to make adjustments to some settings parameters.
You can choose for example whether the flash will work or not, whether it will work with automatic or manual ISO and also choose the white balance.
Definitely using the camera’s automatic program mode is really fun and a good way to learn how to use it.
But if you want to improve your photos you definitely have to know what they are and what the other modes of operation of your camera are for.
Av (or A): Aperture Priority Mode
When you want to have full control over the aperture on your lens (and therefore also control the depth of field ), this is the way to use it.
It allows you to adjust the aperture of your lens, and the adjustment mode can vary from camera to camera, and the rest of the adjustments are up to the camera itself.
Shutter speed and ISO will be automatically adjusted by the camera so that you always have a balanced exposure.
When we have a good lighting condition this mode is the mode you would like to experience.
You will have control over the plane to be photographed, using a narrow aperture to make everything in focus or aperture larger thus separating the planes, foreground in focus and blurred background for example.
But when we have a low light situation, and we don’t have a flash, the camera will choose a slower shutter speed, making photos blurry.
Or even, choosing a very high ISO setting bringing a lot of noise to your photo. Sometimes you will want to take care of the ISO setting to decrease the amount of noise.
Tv (or S): Shutter priority mode
Much like AV mode, TV mode, or S on Nikon cameras , it lets you choose the shutter speed.
And other settings like aperture and ISO are up to the camera, and again are automatically calculated to obtain a balanced exposure.
This mode is particularly used when you are shooting a scene with a lot of action, a fast scene where you need to freeze the movements.
By being able to set the shutter speed, you can choose the best speed for the scene, thus avoiding blurry photographs.
The rest of the values, ISO and aperture, are up to the camera, and it is worth taking care of in very dark environments, as the camera can choose a very high ISO setting.
Most DSLRs can fire very fast, about 1/4000, which is already great for freezing any movement.
Another option is to work at the other end, with a very slow shutter speed, and using light painting.
This technique is widely used for long exposure photographs, and can save your life in situations where you have time and poor lighting.
Preset Programming Modes (Preset Mode)
Some cameras have very good operating modes in the per-defined settings system.
They are the settings that usually appear with stickers on your control dial, so if you need a landscape shot, for example, it is worth just testing the mountain icon.
Or when you’re watching a football match, use the settings of people in action and your camera adjusts the shutter speed faster to freeze movement.
Some cameras have an adjustment called A-Dep, it is a completely automatic mode that allows you to choose two points (foreground and background).
Very used for when you don’t know which aperture to use, as the camera would set aperture based on what you want in focus and what you want out of focus.
It’s a really fun fit, although it doesn’t always work perfectly in practice.
Another adjustment that you always have to keep in mind is the adjustment of the Radius, with or without flash, in low light situations the use of a flash can define the success of your photo.
Now that you know what almost all your camera’s operating modes are for, it’s time to practice, photograph, share and share!
Leave your comment and follow us on Facebook!
