


In last week’s article I promised I would post an article talking about Photoshop this week, because of that here it is, a very simple article on how to create double exposure images in Photoshop. Who saw the previous post already know how it is possible to take h double exposure photos directly on camera, so today we will take a slightly more controlled path.
How to create double exposure images
Actually working with Photoshop is just an option because there are a variety of apps as good as Photoshop is out there for the double exposure matter. But because it ts the reference software in image editing, it’s very likely that we’ll hear about it for a long time yet.
Many things in PS (Photoshop) are easy to do and need just a few clicks. Others things need hours and more hours of work. Creating an image with double exposure is not one of those tasks that will consume you all day, it’s more like 30 minutes of your life only.
The first thing to do is to choose the photos you would like to combine in your photo with double exposure.
The best tip here is to choose the main photo first, the photo that will have the most importance in its composition. Of course, it’s always good to have a good idea of the theme before you start working, so choosing images that tell the story that you want to tell better is something you should always keep in mind.
For the tutorial I will choose this photo as the main photo of my double exposure:

And to compose the rest of my photo I will use this other image.

Cutting in Photoshop
Cutting things out Photoshop has gotten easier every day, and today we’re going to need some of this knowledge. I love working with the selection tool and masks, almost always the work comes out easy and fast. But I always use a trick to start my selections, it helps me a lot when creating more precise image cut-outs.
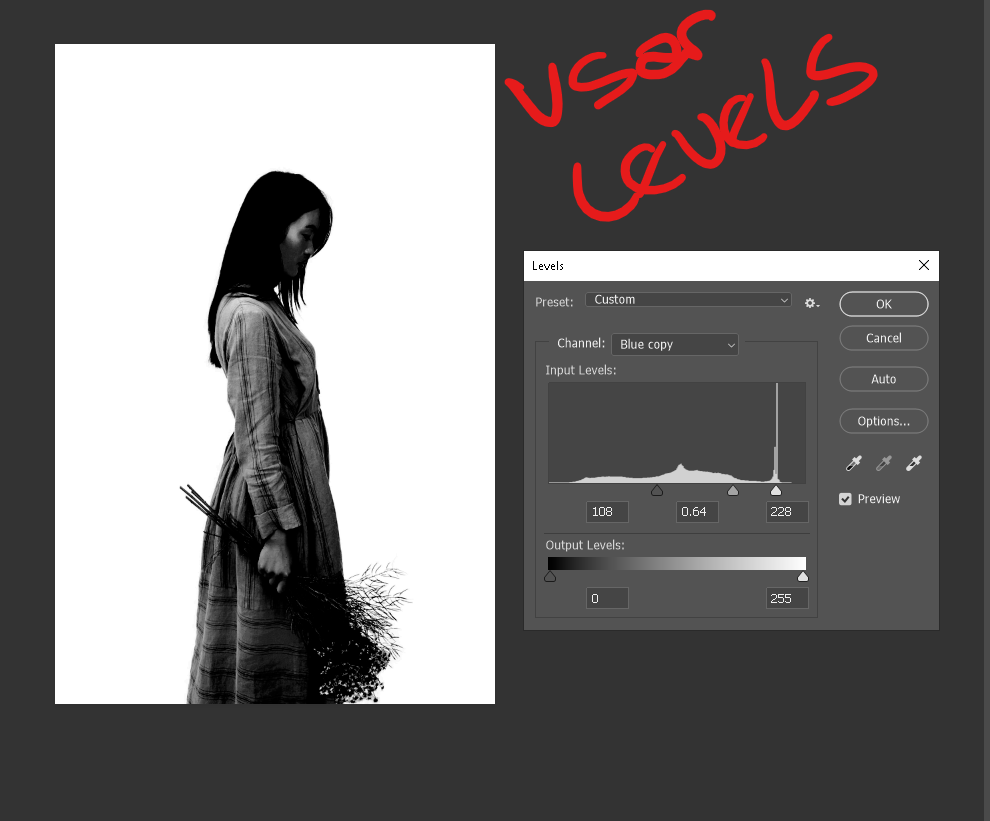
The trick is pretty simple. First we go on the Channels tab and duplicate the channel with greater contrast, in this case here I will use the blue channel.

Then use the Level filter to further increase the contrast of the photo, making the girl black or almost totally black and the background turns white. Shortcut to Levels is ctrl+l or command+I for mac users. If necessary you can use the brush, shortcut key b, and paint black areas that belong to the area you want to select.
Once you have a great contrast between what you want to select and the background of the image you can use some of the selection tools such as magic wand or select by color (Color range selection). Because of the great contrast between you can select almost perfectly everything.
Now with the selection ready it’s time to create a mask on your image, and this is super easy work. To do this, simply click on the third icon from left to right of the layer tab footer. You can also create an inverted mask by holding the Alt key while clicking the new mask icon.
Don’t always forget to save your progress in case something unexpected happens, and always after finishing a masking in Photoshop it’s important to save the file.
Double exposure with layers in Photoshop
Now that you already have a layer with the mask ready we can bring the second photo to the game. Here it is very easy to just drag the second image into Photoshop that it will be imported into the file you are working on. Once your second image is already in Ps go into layer opacity and decrease to about 50%, so you can see the main image as well.
Now just position the second image where you think it will look interesting and we are ready to start creating!
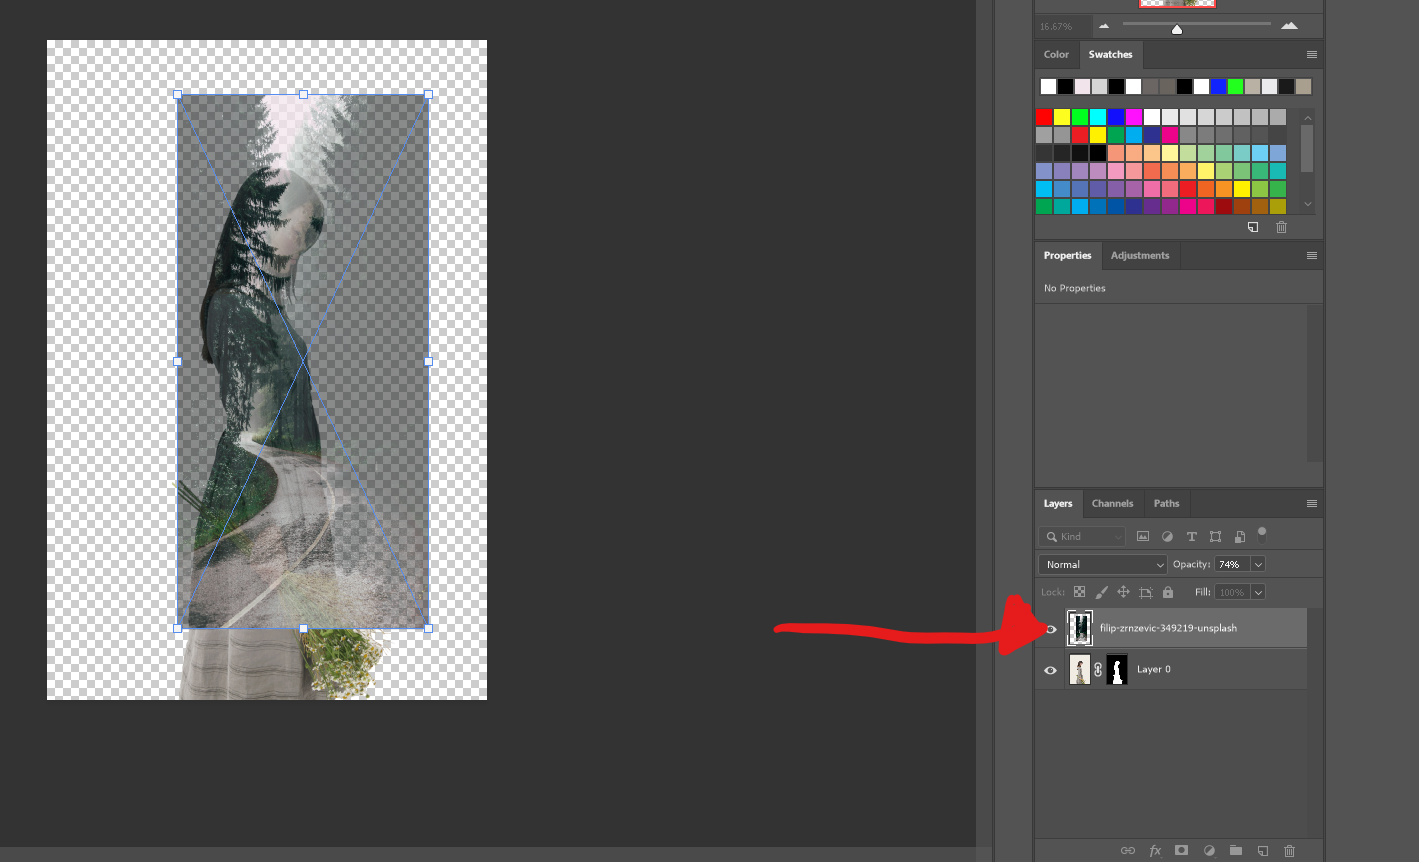
With the second images positioned copy the masking from the first to the second image. To do this simply drag the mask from one image to another with the Alt key pressed.

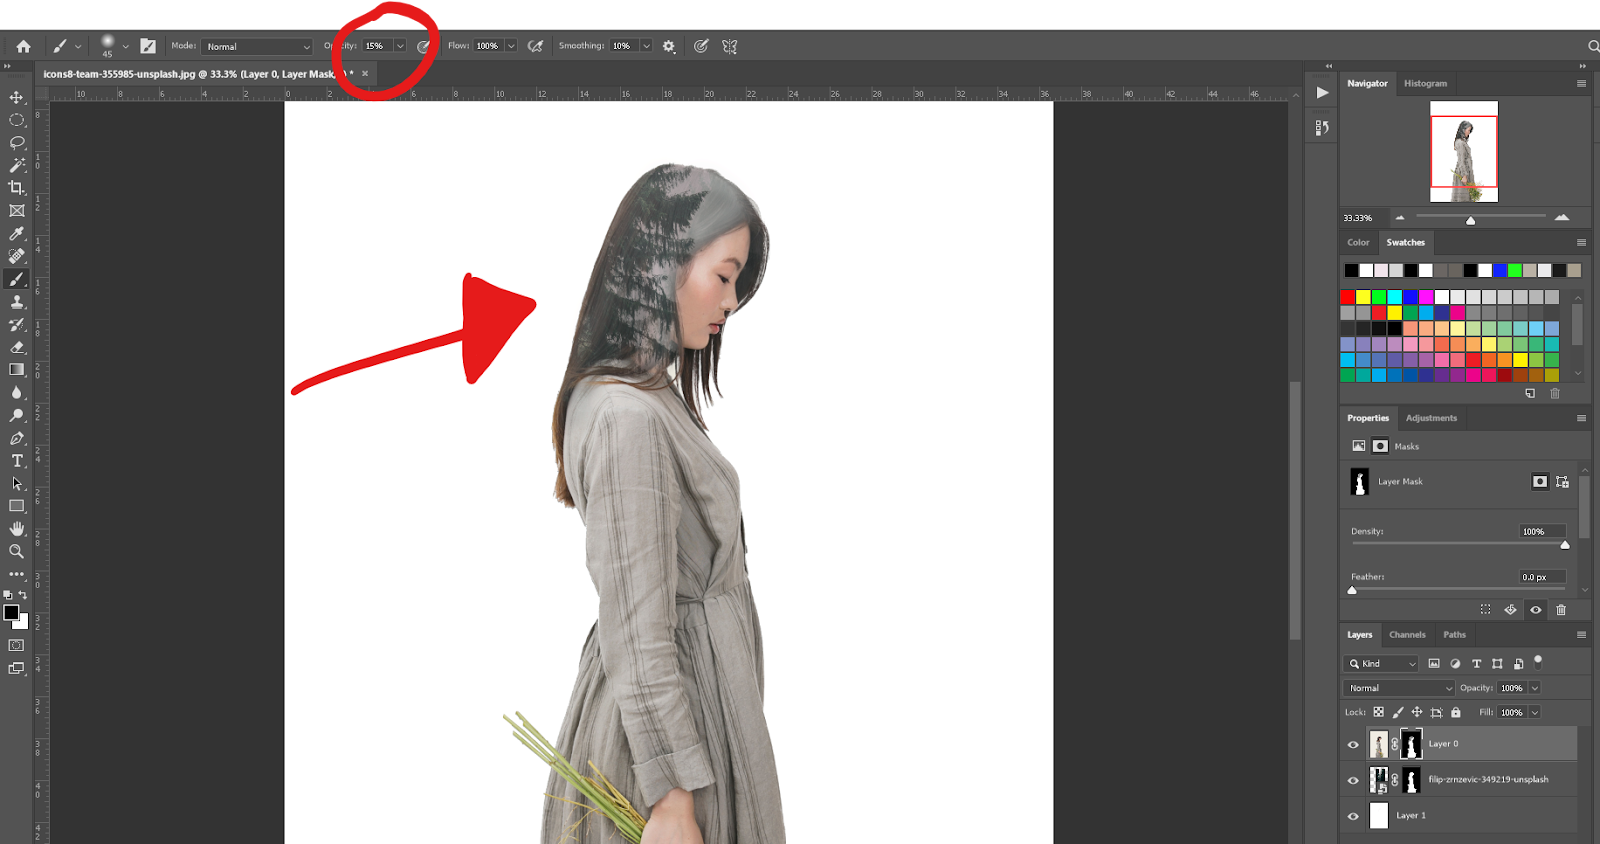
Reverse the order of the layers, leaving your main object on the first layer, and select the mask for this layer by clicking on it. Now the job is easy, with the mask selected just use the brush (letter b) and start painting the regions where you want the second image to appear.
The ideal is to use a low opacity on the brush, this can be adjusted in the top menu when you select the tool. As we are painting a mask we will use only the colors black and white, so when you are painting a mask remember the following:
- Painting white on the mask shows what’s underneath
- Painting black on the mask hides what’s underneath
Using a low opacity on the brush will help you create a more fluid, less abrupt fit, and the result becomes much more natural.
Finishing the image
Now that you’ve finished all the adjustment in the mask you can work with other filters like ACR (Adobe Camera Raw), which is a kind of Lightroom within Photoshop, to finish your image.
You can also slightly change the composition using the native crop tool, shortcut key c, to change the proportions of the image. As soon as you’re done just export the image from the File > Export menu.
Ready your image is ready to conquer the interwebs. If you like this kind of content consider share this post on your social media.


