


Article content
First post of 2017, and as with new year the work cannot stop we continue with a little more about Lightroom in the Lightroom color adjustment panel.
For many, Lightroom can be an intimidating program due to the amount of adjustment and possibilities it delivers, but in fact, just learn the basic concepts that the rest of the software will teach you.
And as we saw in the previous article, Lightroom Basic Panel Controls , you don’t always need to know the entire program to make great adjustments to your photos, but it is indisputable that the Colors panel will help your photos stand out in any scenario. .
Tips for understanding the Color adjustment panel in Lightroom

What is the Color adjustment panel in Lightroom?
Unlike the basic panel, which allows you to adjust the photo’s most global exposure settings, the HSL / COLOR / B & W color adjustment or adjustment panel allows for a more selective adjustment of the photo’s colors.
With it you will be able to manipulate, emphasize or decrease various aspects of one or more colors in your photograph.
He is the third panel in the development guide, Develop, by Lightroom, and it is possible for Spanish to work on all aspects of color at once, or just one aspect at a time.
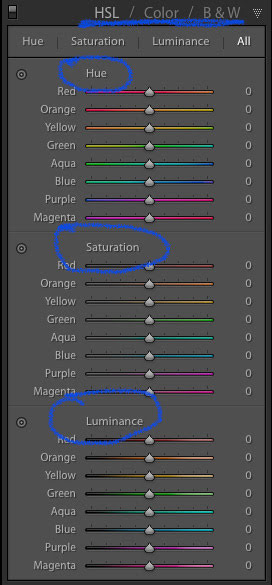
- HSL: Allows you to control the Hue, Saturation and Luminance of all the main colors that make up an image (Red, Orange, Yellow, Green, Aqua, Blue, Purple and Magenta)
- Color: This is essentially the same thing as the HSL panel, as you will see shortly, but the options are organized to help you focus on specific colors and then specific types of adjustments within those colors.
- B&W: This panel is often the most misunderstood, but one of the most powerful tools available in Lightroom when it comes to converting your images to black and white.
The HSL tab Lightroom Adjustment Panel

HSL is the abbreviation for HUE, Saturation and Luminance, which mean Hue, Saturation and Luminance respectively.
Here things get very interesting because your photo can change dramatically, depending on the adjustments that are applied to the photo.
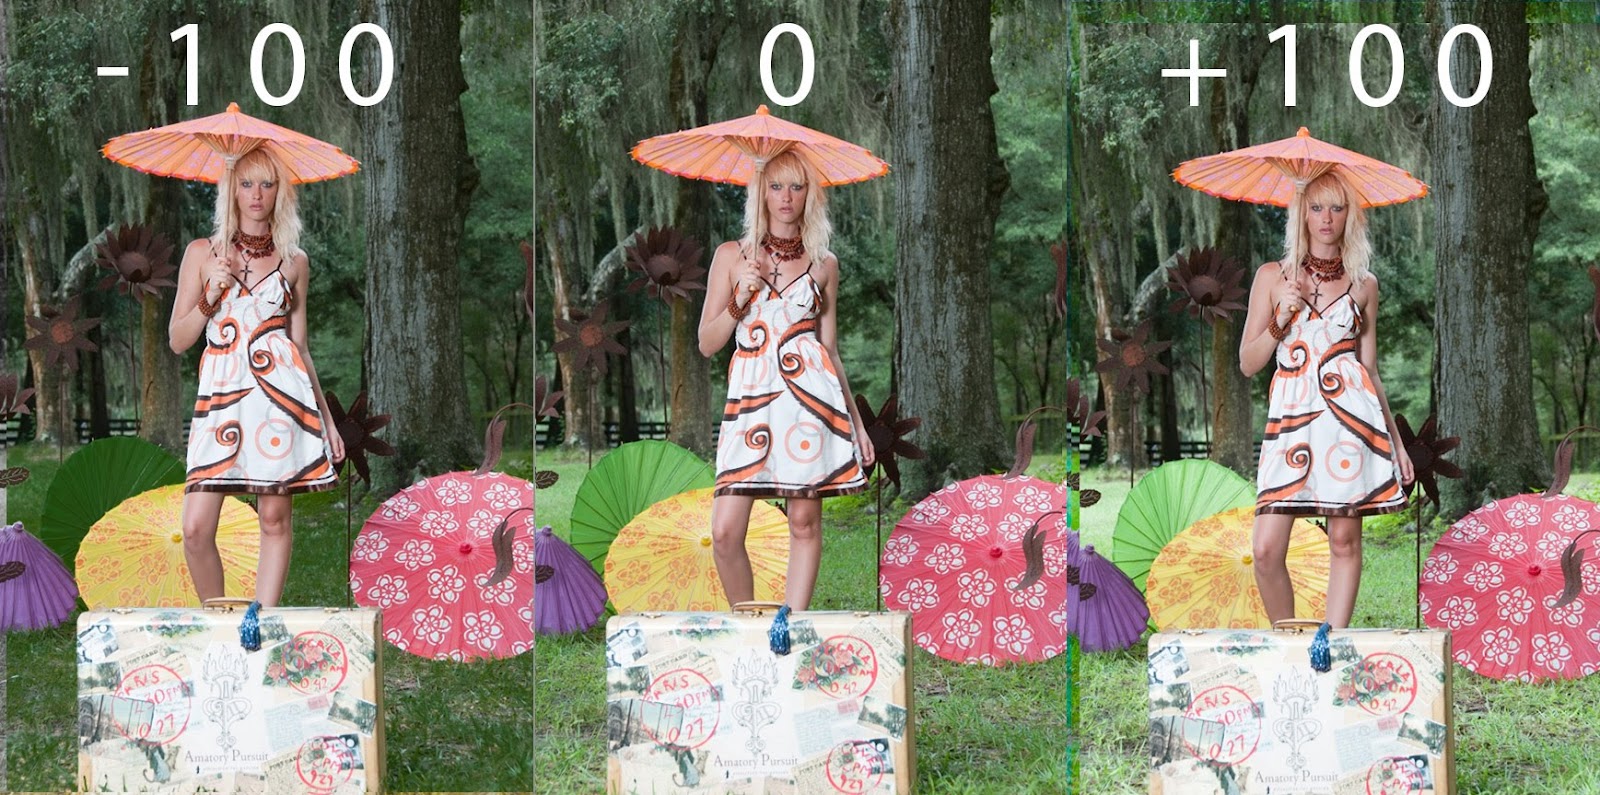
First let’s talk about Matiz, Hue, where you can change the appearance of specific colors, like blue, yellow, green, etc. throughout the image, completely changing her mood .

In the photo above we can see a striking difference between the hue of green, when we compare the maximum settings, -100 and +100 in the green control of the Lightroom hue adjustment.
By experimenting with the other colors, you will see how you can work on a photo at a much deeper level than just the controls at the basic level.
Adjusting the hue control can be a powerful tool on the panel especially when you need adjustment where White Balance cannot be that effective.
Learn more about white balance here
Always try to work with subtle adjustments in the Hue, Hue, Lightroom guide so as not to leave your photos too loaded, as long as this is not the intention.

Perhaps the most valuable tip in this section of Lightroom is the control marked in blue in the photo above. By creating it you enable a super simple mode of operation.
When enabling this editing mode the only thing you need to do is click on the color, on the photo itself, that you want to manipulate and once with the right mouse button pressed you will just move it up or down to manipulate the matrix .
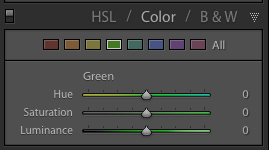
Lightroom Adjustment, Saturation and Luminance panel.
The next two tabs on the Adjustment panel, saturation and luminance, work in the same way as the hue guide, and can be adjusted in the same way.
The differences are where each one of them will work in the photo, the saturation will make the color being adjusted stronger or weaker.
The luminance will work on the color clarity, making it lighter or darker, a very interesting tool in many cases.
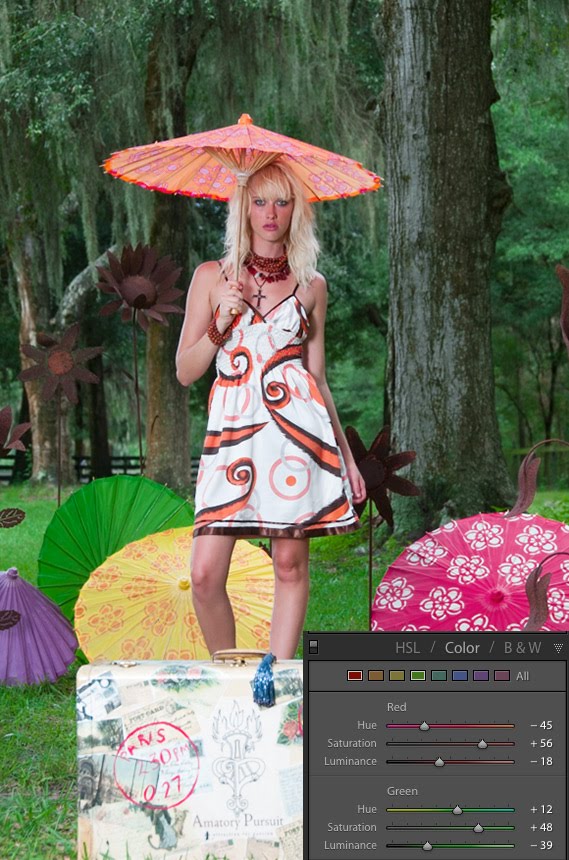
In this photo we can see the effect of the saturation adjustments, working only in green, when we set the saturation to -100 we are saying that the referred color has no saturation, so that region will be in black and white.
Here the effects of the luminance guide, also adjusting only the green color, extreme adjustments in this guide are not usually very common, but they can work depending on the photo.
The Color tab
When you click on the Color guide, you will certainly have a feeling of déjà-vu, as the options are very similar to the HSL guide.
The difference here is that the hue, saturation and luminance adjustments are separated by colors, and for many people it is easier to organize themselves.
A nice thing about this tab is that you can see only the colors you want to work with, by clicking on the color with the shift key pressed, you enable only the two, or more, colors you want to work with.
Lightroom Adjustment panel and the black and white guide (B&W)
By simply clicking on the B&W tab, your photo will turn into a black and white photo, but don’t think that your work is over.
Do not think that it is not possible to make color adjustments to a black and white photo.

For many people this part of the Lightroom adjustment panel can be the most confusing, exactly because Lightroom already turns your photo into black and white by clicking on the tab.
A practical example of B&W conversion

To give you an idea of how colors work, even in black and white photos, let’s work on a practical example.
See how just by manipulating the orange control, orange, in the same photo it is possible to change its appearance, even if it is black and white.
Note the girl’s skin tone, the two adjustments work in this region completely differently, so it is very important to pay attention to how you adjust the colors in your black and white photos.
That’s it for now. leave your comment below
Liked the article consider sharing it on your social networks and help the blog
