


Article content
Wassup guys, it took me a while, but I am back, and I didn’t die, and to prove it today we’re going to talk about photography terms that you need to know. I’m actually more alive than ever. Sorry about the big disappearance. But in addition to a little vacation, I also ended up getting into one of the biggest projects of my life! When it’s more opportune, I’ll tell you everything!
The bid today will be how you beginner in photography can unravel the secret code that many photographers use, the famous jargon of photography. After all who never got totally lost when a friend who is a photographer started speaking in a language that only they understand.
So today I’m going to give you at least 38 photography terms you need to know, and besides, I’m going to brush each one. Sit, pick up the coffee mug because this is going to be great!
38 Photography terms you need to know – Almost all the jargon used by photographers
1 – What is Aperture?
Aperture is the size of the hole in your lens. But it’s not that simple.
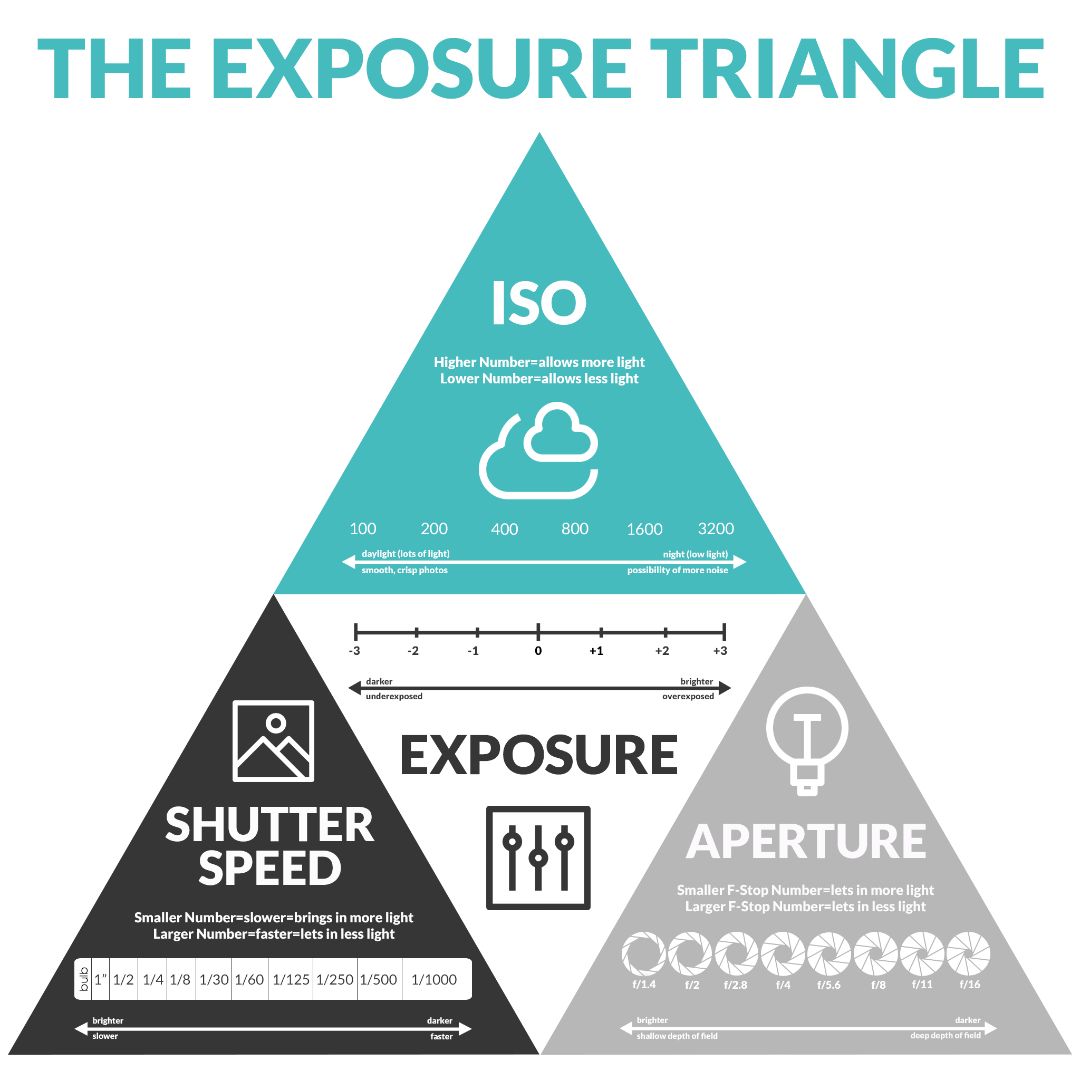
The aperture controls the amount of light that enters the camera, and this is one of the pillars of a photo’s exposure. In addition to controlling how much light enters the camera, it also controls how much of the scene is in focus. In this case we have a pretty name for this which is depth of field. Large apertures like f/1.4 will cause the background of your photos to become blurry.
There are two more photography terms related to the aperture that is – a faster lens or a more open lens, which means that this lens can reach larger apertures.
On the other way, we have the smaller openings/aperture. This will keep almost everything in focus, and will make your camera capture less light. Usually we’re talking numbers like f/8 up to f/32.
I know that these numbers can be quite confusing, since a small aperture equals a larger f-number. But here’s a simple way to remember.
Large aperture = Small f number = Shallow depth of field
Small aperture = Bigger f number = Deeper depth of field
If you still feel confused, I suggest reading this article here, in it, I talk all about aperture. And you can also take a look here where I talk more about the F/Stops.
2 – What is Shutter Speed?
Following on the toil. The shutter controls how long your sensor or photo film will be exposed to light, the same light that the aperture let in. It’s as simple as that. It’s kind of a curtain in front of the sensor that opens and closes as soon as you press your camera’s trigger button.
The time when the sensor is exposed to light will directly influence the exposure of the photo, here we have the second leg of the exposure triangle. With the correct choice of shutter speed you can create different visual effects on your photos.
You can simply freeze the moment, using a faster shutter speed, or you can create a more fanciful effect by using slower shooting or slower shutter speed.
Shutter speed is shown in fractions of seconds like 1/125, or in full seconds such as 1, 2 up to 30 seconds or more.
Simply, the longer the shutter stays open, the more light hits the sensor and this will make the photos brighter.
If you want to know more about how to use your shutter more creatively in your photos, just read this article here.
3 – What is ISO?
Are you still there?
Okay, so there’s more. In other words, the ISO is nothing more than how sensitive a photographic film is to light.
This “ability” was also translated into the digital medium, so we can say that the ISO in digital photography is how sensitive the sensor is to light, which is only half the truth.
In digital photography, ISO in easier terms acts like photographic film, as I explained above. But in fact, when we adjust the ISO, we digitally increase the electrical gain capacity of the sensor to transform light into electrical signals. And it has a lot of consequences.
But with the ISO we complete the famous exposure triangle, aperture, shutter, ISO (sensitivity). All these settings will always be correlated, so that when you change the shutter speed you may have to adjust one or two of the others before taking the picture
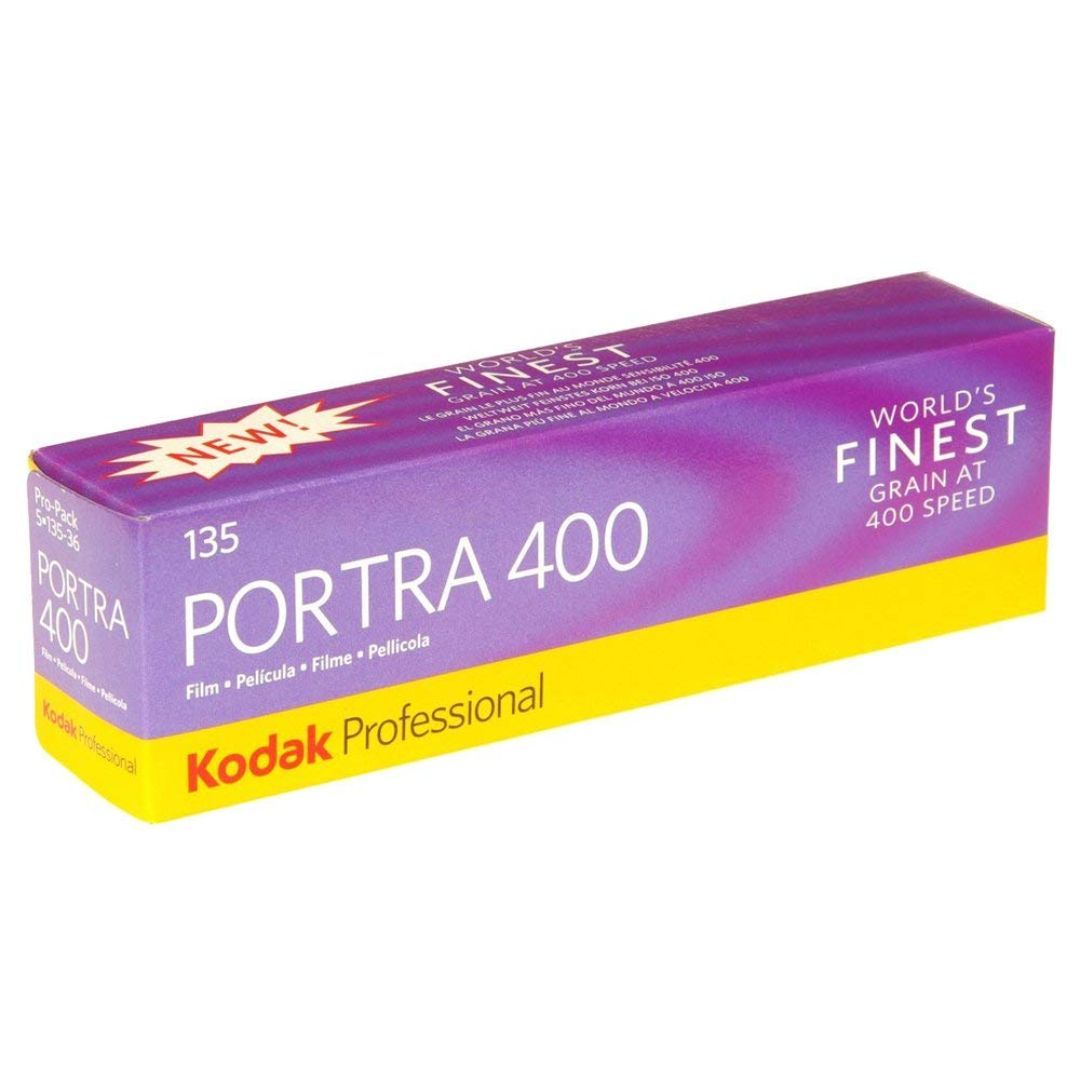
Normally, the ISO is adored by many and hated by others. The reason is simple, GRAIN in the photo. When we use a high ISO setting, we will introduce some noise, also called graininess or just grain, into our photos. The same happens with photographic film, because you buy the film with the desired sensitivity / ISO.
Here the numbers are very simple, digital or analog photography, the higher the number the more sensitive to light, the lower the number less sensitive to light.
4 – What is Photographic Exposure ?
Exposure is basically how light or dark an image is at the time of capture. This is determined by the amount of light that hits the sensor or the camera film. That is controlled by the three main camera settings: shutter speed, aperture and ISO.
If you have not exposed your image correctly, and it is too dark, the sensor has not received enough light. We call it underexposure. To fix this, you need to use a slower shutter speed, open your aperture or increase your ISO setting.
If your image looks too bright, the sensor has received a lot of light. We call it “overexposed.” To fix, you need to use a faster shutter speed, close the aperture or use a lower ISO setting.
5 – What is Depth of Field?
Depth of field simply means how much of your image will be in focus, from the front (the area closest to you) to the background (the area of the image furthest from you).
If you’re shooting something like a portrait, you may want the background to be a little blurry, so that when you look at the photograph, your subject really stands out from the background.
This is called shallow depth of field.
If you’re photographing a landscape, you may want everything from the front to the back to stay in focus, so we can clearly see the whole landscape.
This is called deep depth of field. Sometimes it is also called only depth of field.
The depth of field is largely controlled by the aperture setting on your camera. A large opening will produce a shallow depth of field. A small aperture will produce a deep depth of field (with almost the entire photo in focus). But this is not the only way to control the depth of field.
Mastering depth of field is one of the biggest keys to creating an impressive image. When used correctly, it can turn a photo from good to great.
Be sure to read this article here to fully understand what it is and how to use depth of field.
6 – What are F/Stop or F/Numbers?
This is a term used to describe aperture positions on a lens. Controlling how much light enters the camera when a photo is taken. F-stop numbers are used to control the size of the aperture that lets the light into your camera.
Don’t worry a lot about it. Because it’s a lot more complicated than it looks, because there’s a mathematical calculation to set the F-number of a given lens.
What you really need to know is the relationship between the F-numbers, or F-stops, with the aperture of your lens. So keep in mind. Small F-numbers, F/1.8, mean the lens will have a big aperture, a hole to pass the light is large. Just like an F number with a higher number, F/22 will produce a much smaller hole, or aperture, in your lens.
7 – What are Stops ?
Stops is a term widely used in photography, mainly by professionals, to describe how changes in camera adjustments occurred in the exposure of the photo.
Think of the following situation. You take a picture, and it comes out underexposed, your camera settings are:
- Shutter = 1/60
- Aperture = F /2.8
- ISO = 100
Now I tell you that for this same photo to be properly exposed you have to make a change of 1 stop.. If the photo is dark, you have a few options. Slow down the shutter, increase the aperture, or increase the sensitivity of the ISO.
You decide you don’t want to increase the ISO to not produce noise, and that you also don’t want to mess with the depth of field. Then you only have the shutter setting, which needs to be adjusted at 1 stop slower. In this case, going from 1/60 to 1/30. So it will stay twice as long open and will allow double light into the camera.
As soon as you become familiar with this term, and how to make such changes, you will be able to make these type of decision in a matter of seconds.
To get a real grasp in this subject I suggest you give a nice read in this article here where I explain everything in much more detail.
8 – Manual mode
When using Manual mode (which is usually marked as ‘M’ on a camera), you set the shutter speed, ISO, and aperture. Manual mode gives you full control over your image exposure. You will be responsible for all decisions related to the exposure of the photos.
There are many advantages to using manual mode, as well as advantages in using the camera’s semi-automatic modes. If you are going to take photography seriously, it is good to have deep knowledge on how to use the manual mode of your camera. Click this link here and see at least 4 reasons to learn how to shoot in manual mode.
9 – Full frame camera or cropped camera
Full-frame cameras use a sensor of equivalent size to the 35 mm film. Typically, full frame sensors can be found on cutting-edge DSLRs and increasingly in mirrorless cameras.
The cropped sensor is smaller than the full-frame. If you have a cropped sensor, you will have a magnification factor, usually between 1.3x and 1.6x. This essentially means that the sensor is literally “cutting” the edges of the frame. Which actually increases the focal length and produces such magnification.
Did it get hard? Wait. In practice, if you use a 50 mm lens produced for full frame on a cropped camera the magnification factor will be applied, and you will actually have a lens close to 75 mm. Many lenses are produced only for cropped cameras, so they do not present this magnification factor.
But… what is the benefit of a full-frame camera?
The main difference between a cropped sensor and a full frame sensor is the size of the camera sensor itself.
The full frame camera features a larger sensor, which offers a wider dynamic range and better low light performance. The full frame camera also allows for a shallower depth of field than a cropped sensor.
But to be honest, one’s not necessarily better than the other. They’re just different.
And the reality is that due to technology, cropped sensor cameras are rapidly reaching their most expensive full frame friends.
In addition, cropped sensor cameras can be slightly lighter and less bulky than full frame cameras, and are also slightly cheaper.
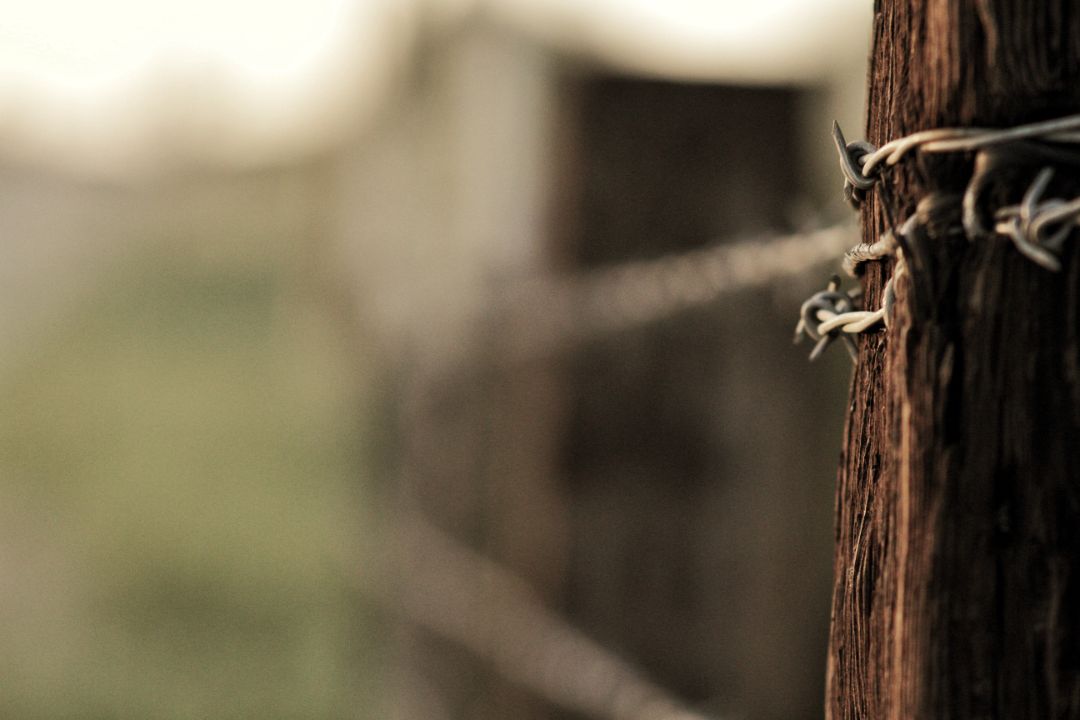
10 – What is Bokeh?
Have you ever seen a photo where the main subject is sharp while the background is slightly blurry?
This effect is known as bokeh. They say the term comes from the Japanese word “boke”, which means “blur” or “fog”.
Bokeh helps bring your photos to life by separating the subject from the background. This makes the subject seem almost detached of the picture. Put the main subject into sharp focus while nicely blurring the background.
By mastering the bokeh, your photographs will become more visually appealing. It places the focus on a specific area of your photo. Allowing you to highlight some objects while hiding others in the blurred area.
To produce a nice bokeh effect on your images, you need to use a quick lens. A quick lens is one with a large aperture. Lenses with a maximum aperture of f/1.4 or f/2.8 will produce the best bokeh.
You will also need to take into account the focal length. The 35 mm, 50 mm and 85 mm prime lenses are excellent options for bokeh production. The longer the focal length (the greater the number in mm), the greater the separation of the background.
You can also create this background effect by approaching the subject. The closer you are to the subject, the more the background will become blurry. Another way to increase the distance between the subject and the background. You’ll increase the amount of background blur in your photos, keeping subjects further away from the background.
With a little practice, you’ll be ready to produce a smooth, creamy bokeh.
11 – How many Frames per second (FPS)?
Most of the time, you probably end up taking one photograph at a time. However, there are occasions when you need to take multiple photos in quick succession. This helps ensure that you capture the perfect moment. Especially when you’re doing action or sports photography.
To shoot multiple frames per second, you need to put your camera in continuous shooting mode (also known as burst mode).
On your camera you probably have a frame rate per second. This number is the amount of photos your camera can take in a single second.
8 frames per second (fps) means you’ll get 8 shots per second (obviously, you’ll need a fast shutter speed!)
In continuous shooting mode, you can simply hold down the shutter button and your camera will continue taking photos.
12 – Which should be my camera resolution?
Have you ever wondered what is the number of megapixels? Well, this is the resolution of your camera sensor.
For example, a sensor with a resolution of 5472 x 3648 pixels will provide 19,961,856 points. Because this number is too long, it will be rounded to 20MP.
Generally, people think that the higher the number, the better the quality. This is true to some extent, but you also need to take into consideration what you will do with the images. You only need a 3MP sensor to get a good 6″ x 4″ impression, for instance.
On the other hand, if you want to frame your images and place them on a big wall or a billboard, you’ll need a camera with more than 3MP. In general, the more megapixels your camera has, the higher the prints produced without quality loss.
Keep in mind that some cameras don’t have the sensor size they claim to have. They use what’s called “digital interpolation.” It uses a much smaller sensor and enlarges the image in software.
We have other considerations here, like file size, storage size and computing power to process the huge files that a high megapixel camera produces.
13 – What is Exposure Compensation?
Exposure compensation is a simple way to make photos brighter or darker.
The exposure compensation button is usually located in the upper right corner of most DSLR and MIrrorless cameras. Denoted by a plus sign (+) and minus (-). This feature is available on most cameras. This small button allows you to change the exposure values of the camera to make the photo brighter or darker.
14 – What is RAW File?
Much like your computer, your camera has many ways to store images. The most common are. Raw. TIFF and JPEG.
RAW is the best way to shoot your images because they record a lot more information than. JPG and Tiff.
RAW files can only be processed by using post-processing software such as Lightroom, Photoshop, or Luminar.
Most cameras can also save your photos in both, JPEG and RAW. Giving you the best of both worlds.
But remember that the RAW require much more space on your memory card and on your computer to be stored, and they need to be processed before call the job done!
See everything you need to know about RAW files here
15 – What is Focal Length?
Focal length is measured in millimeters (mm). You will notice that your lens has a focal length. If it is a prime lens, it will be a fixed focal length that cannot be changed.
A zoom lens has a variable focal length, so you can zoom in and out without having to physically approach what you’re shooting.
In simple terms, the focal length is how the images will be “enlarged”. So, for example, a 50 mm lens will appear more “magnified” than an 18 mm lens.
16 – What is Focus on Photography
Focus is the sharpest point in an image. So if you’re taking a picture of your friend in front of a bush, you will “focus” on your friend trying to leave the bush out of focus. It is the area with acceptable sharpness.
17 – What are the Focal Points in photography?
Most cameras let you choose from many focus points. Most people leave their cameras in autofocus and allow the camera to do the work of keeping the subject in sharp focus. But you can also pick from several other modes that will provide complete creative control over the focal points of your image. Allowing you to focus on certain objects while giving other parts of the photo a blurry and pleasant effect.
19 – What are Zoom Lenses?
This is a lens with a variable focal length. It allows you to “broaden” your subject without having to physically approach. By changing the focal length, you can zoom in and out by composing the photo and framing it as you see fit.
The zoom lens allows you to shoot in a variety of situations without having to change lenses. The main advantage of a zoom lens is its versatility. However, they tend to be slightly larger than the prime lenses because of the moving parts.
21 – What are Prime Lenses?
It is a lens with a fixed focal length. When using a prime lens, you will need to approach more or less physically to frame your photo. What we call zooming in on your feet.
However, this can also be a great way to learn about composition. Prime lenses force you to think about how to frame your photos. Another benefit of prime lenses is that they generally produce sharper images. This is because they don’t have as many moving parts as zoom lenses have.
The use of a prime lens also generally allows for lower aperture values. It allows you to create this beautiful bokeh effect that comes from a shallow depth of field. Prime lenses also tend to do better in low light situations due to their lower aperture values.
There is no right or wrong when it comes to zoom lenses or prime lenses. It depends on the situation and what you’re photographing.
22 – What is a Macro Lens?
Designed to photograph small subjects very closely. It lets you take stunning photos of insects, flowers, water droplets and more.
A macro lens allows you to explore the small details of a flower or the intricate pattern of an insect. Revealing a world that was once invisible to the naked eye. It has a factor of magnification greater than the normal lenses due to its construction.
23 – What is a Telephoto Lens?
A lens that allows a lot of zoom power. Although technically it is any lens with a longer focal length than the standard. Telephoto lenses are usually 70 to 300 mm. This produces a narrower field of view and an enlarged image.
Super telephoto lenses are usually 300 mm or more. That’s a lot of zooming power. With this kind of lens, you can photograph things that a far away and can barely be seen with a naked eye.
24 – How to know what is a Wide Angle Lens?
They’re lenses with a large field of view. Perfect for capturing a wide landscape or tall buildings or any scene where you need to capture a large portion of what you are seeing.
Any lens with a focal length smaller than 35 mm can be considered a wide angle lens. But you should also be careful with the distortion created by wide angle lenses.
25 – Sync with Flash
As you probably know, when the flash goes off, the light only goes off for a very brief period. Making this brief flash moment match your camera’s shutter speed requires a lot of technical work.
Flash Sync is the highest shutter speed with which you can use a flash. Sometimes this is marked with an ‘X’, which will look like: 1/125thX or only 125X.
If your camera has a maximum flash sync of 1/125 of a second, you can use a shutter speed of 1/125 seconds or SLOWER to shoot with the flash. Most of modern cameras have a flash sync speed around 1/200th nowadays.
Some cameras also feature what we call high-speed flash synchronization, which will allow you to use almost any shutter speed.
26 – What is Flash Shoe (Hot Shoe)?
At the top of the camera, usually above the viewfinder, you can see a small square of metal with circles. There will be rails that will allow you to slide some accessories.
This is known as “hot shoe”. Also, sometimes called “shoe accessories”. The shoe is where we can put additional add-ons to the camera … Most of the time, a flash or microphone.
As this shoe is electrically connected with your camera, make sure that you are using accessories designed for this place, otherwise you can damage your camera.
27 – What is Long Exposure?
A long exposure is an image taken with a slow shutter speed (the shutter stays open for a long time). These exposures usually last a second or more.
We use a long exposure when the subject is too dark, such as urban landscapes at night or in astrophotography or when we want moving objects to look blurry, like moving waterfalls or cars.
28 – How to do Light Measurement?
Integrated into your camera, you have a “light meter”. This is a way your camera knows exactly how much light it is getting. This information tells your camera what settings are needed to get a correct exposure.
Generally, there are three types of measurement modes available. They are also known as evaluation models.
Matrix: In this mode, the light meter gathers information about the entire scene. Analyzing colours, overall brightness, contrast, tonal ranges, and more. The camera calculates the average of everything in the scene to determine the best possible exposure. Centre weighting: The measurement is obtained in a large area in the centre of the display. Punctual: The measurement is done in a small section in the middle of the display.
On our camera, we also have a reflected light meter, which will send the light information to the evaluation modes. We don’t have control over this light meter, just how to evaluate the measurements.
The other type of light meter is an incident light meter, which is used to measure the brightness of a strobe or a natural light source.
29 – What is Grain (Noise) in Photography?
Noise is the modern word use to describe film grain.
Photographs taken with low ISO settings (ISO 50-200) have very little grain / noise. As the ISO increases, you’ll notice more discoloured dots in the images, especially in dark scenes. This is the “noise” we are talking about. And it will get worse as soon as you go to higher ISO adjustments.
There are a lot of reasons for this noise, and most then are out of the photographer’s control.
30 – Where is shutter button?
Sometimes known as “Shutter Release”, this is the big button at the top of the camera that we use to tell the camera to shoot and take the picture.
A remote release is a shutter button on a cable or even a wireless system that you can use to take a photograph without physically touching the camera. Used regularly when making long exposures.
31 – What is a single lens Reflex?
Better known as “SLR” it is a type of camera construction. Single lens reflex means that when you look through the viewfinder, you’re actually looking directly out of the lens with the help of a pentaprism. The image you are seeing is a good representation of the reality.
32 – What is Time Lapse?
Have you seen those videos where plants grow at a phenomenal rate or buildings emerge in just a few minutes, even if these things should take days, weeks or months?
That’s what we call “timelapse video.”
For a video to appear to be moving the same way we see things in real life, you need to capture 24 images every second (24 fps) at least.
A time last is just a way to reduce the amount of images you need to composed 1 second of video.
The amount of photos you need to take depends a lot on how quickly the subject is. A building that takes a year to build will need only 3-4 photos per day to look like it’s being built in just a few minutes.
33 – What is a single lens Digital Reflex (DSLR) camera?
It is essentially equal to SLR but instead of recording the images in a photographic film, the image is recorded on a memory card. The term is an abbreviation for Digital Single Lens Reflex
34 – What is a Mirrorless camera ?
Mirrorless is the name given to certain cameras that don’t rely on pentaprism technology that help you see the frame on the camera viewfinder. Instead, they rely on an electronic display that usually is a faithful representation of what will be captured.
35 – Where is the Viewfinder?
A viewfinder is what you use to compose (and often) to focus your photo. There are two main types of camera viewfinder. Optical (OVF) and Electronic (EVF).
DSLRs have an optical display. Electronic displays are found on some mirrorless cameras. But not all of them.
An optical viewfinder allows you to see the frame in the same way as your eyes. An electronic viewfinder allows you to see exactly what the camera is digitally viewing. The great benefit of an electronic viewfinder is that you can “view” exactly how your photograph will look (based on current camera settings).
The viewfinder is one of the best tools a photographer has to capture a properly exposed image. And the electronic viewfinder is especially useful for new photographers who are starting out and learning how different camera settings affect a photo.
36 – What is Liveview ?
Liveview is another way to see what your camera is seeing, nothing more than to make the image that is in front of the camera appear on the screen of it in real time.
37 – What is White Balance ?
White balance is a setting to correct the colour of your photographs based on the colour of the light source.
Sunshine actually has a completely different colour from the light on a cloudy day. Tungsten light has a completely different colour from halogen light. Your eyes are incredibly sophisticated to correct all these different colours without you noticing.
Unfortunately, your camera is not so good at getting the different colours with the correct look! White Balance can be set manually by selecting one of the presets, such as: “Daylight”, “Cloudy”, “Fluorescent”, depending on the light in which you are shooting.
Click here to see how to avoid using the white balance in the wrong way.
38 – What is Proportion ?
The relationship between the width and height of an image. It is usually expressed as 3:2, 4:3 or 16:9.
If you have a photo with a ratio of 3:2, the image size can be 300 x 200, 600 x 400, or up to 1350 x 900. As long as the ratio between width and height remains the same (3 : 2)
By changing the aspect ratio, you essentially “crop” the image. Changing how much of the frame you can capture in a single photo.
To give an example, the Sony a6000 has a 3:2 sensor, so using 3:2 will provide the “whole image”. That can be cut to a different ratio later.
This becomes even more important when you want to print your photos.
- A 4×6 print has a ratio of 3:2.
- And a 5×7 print has a ratio of 5:7.
- And a 8×10 print has a ratio of 4:5.
But what if the aspect ratio of your original photo doesn’t match the print aspect ratio?
Your image will be cropped to match the print aspect ratio. So decide how you want to use / print your photo first and select the best aspect ratio based on that.
39 – And the Golden Hour?
This is the period of a day just after sunrise and just before sunset. The exact time window depends on your location and the time of year. But on average, it lasts about an hour. It is the first hour of the sunlight at the beginning of the day and the last hour of sunshine at the end of the day.
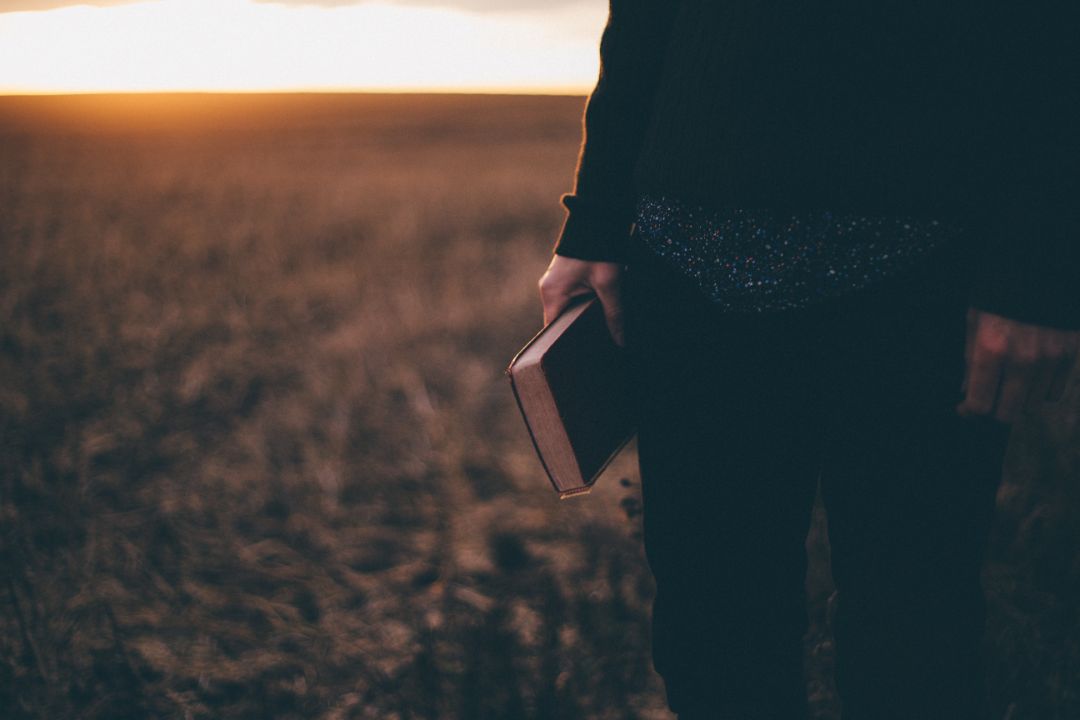
Many photographers believe that this is one of the best moments to shoot as it provides your photos with a soft, warm and golden light. It is also a more diffuse light, making it easier to get a more evenly exposed photo.
The End
Phew, is over…we have completed at least 38 photography terms that always put questions in people minds. Not that there are no more photography terms out there, but these here are really useful in everyday life.
If you’ve read everything I congratulate you are a warrior and deserve a round of applause!
Don’t forget to share this article! This helps the blog a lot! And until the next post.

